
Audiobook creation – lessons learned about microphones
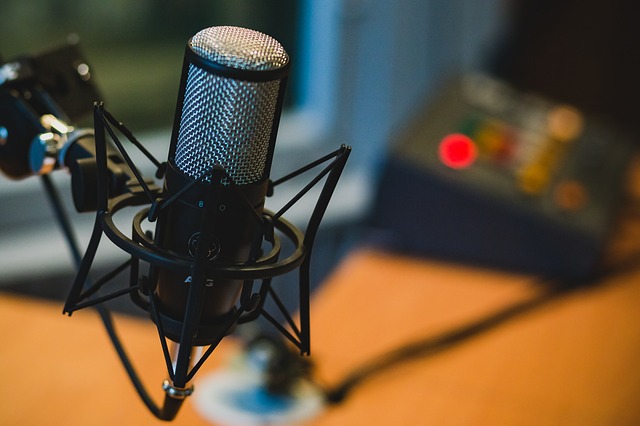
In December of 2018 my family bought me a Neewer NW-7000 USB condensor microphone. For some time now, I’ve been considering creating Audiobooks through ACX. This gave me the excuse (impetus ?) to get out and actually do it.
My Lessons Learned from recording an Audiobook for ACX
This is the third of the articles on my lessons learned from recording my first audiobook. There is an old saying that there are no mistakes only opportunities for lessons learned or not learned. Let’s just say that I made a few mistakes along the way and I want to ensure that they are learning opportunities.
Each of the lessons learned articles deals with a topic encountered in order of occurrence:
- Research
- Preparation:
- Microphones and audio equipment
- Headphones
- A place to record
- Computers & software
- Recording:
- Narration
- Editing
- Publishing
This article is on Microphones and audio equipment
Choosing a microphone
As I mentioned before I didn’t get to choose my microphone. I had been investigating this particular microphone and had pretty well determined that it was the best for my needs. But the choice was made by my son. Since then I’ve learned a few things.
There are two important criteria for microphones. The first is the type (how it works) and the second is the (recording) pattern. A third criteria is the computer connection which I will discuss although it isn’t that important.
Types of Microphone
There are three types of microphones: ribbon, dynamic, and condensor. Ribbon microphones are the most expensive (think multiple thousands). If you are reading me, why are you even thinking about one of these? Forget it. That’s for professional audio engineers. Just ignore them. Buy a car instead. Dynamic is the other end of the price point. These are the oldest technology. Cheap, durable, and not especially good. An expensive dynamic mic can be had for roughly $100. They tend to be used by bands for live music and by cheap headphones. Condensor microphones (like the NW-7000) are the standard mic for recording studios. They are responsive and somewhat delicate. Prices have a range from $20 up to several thousand. The Blue Yeti mics for example are around the $150-200 mark depending on who you buy from and when.
Recording Patterns
The second criteria, is the recording pattern. There are five: unidirectional, omnidirectional, Figure 8, cardiod, and super-cardiod. With unidirectional, what you point at is what you record. It picks up nothing from the sides or the back. Omnidirectional is the opposite. It picks up from all directions. Figure 8 picks up from the front and back but not the side. And cardiod is sort of a mid-point between the unidirectional and omnidirectional. It ignores what is behind, picks up what is in front and to a limited extent picks up what is in front. Sort of a heart shape with the point directly in front of the mic. Super-cardiod is cardiod on steriods. It adds some pickup to the back to a standard cardiod pattern.
Connecting a Microphone
The final criteria isn’t really important enough to be called a criteria. It’s more a characteristic. There are three types of connections: USB, plug, and XLR. USB connects direct to a computer. XLR connects to an amplifier for power, and plugs connect to an amplifier without power. You’ll find a lot of angry opinions on the internet. I’ll comment in a moment but for now, XLR requires an additional box (roughly $30) to supply (phantom) power. Plugs (either 3/4 or 3.55 mm) plug into an amplifier or directly into a computer’s sound card connection. The advantage of the plug and XLR is that you can pre-process the sound (i.e. amplify or equalize).
So, as I mentioned, I didn’t actually choose my mic. I was given it. But it was the one I would have chosen if I had chosen. It was reasonably priced (i.e. on the cheap side). It was rated well by the youtube “experts”. And it came with all the fixin’s (isolating shock mount, scissor arm stand, and two different windshields or pop filters). Cool. I was happy.
So what did I learn?
My microphone choice
Well, to start with I picked the wrong type of microphone. You see, the condensor microphones are extremely sensitive. Which is perfect if you are in a sound booth recording music. I’m not. I’m in a living room recording voice.
It turns out that I should have gone for a dynamic mic such as the Samson Q2U or the Audio-Technica ATR2100. They’re cheap and they aren’t very sensitive. That’s why they’re used for live events. They can’t pick up the crowd noise. You have to be right on top of the mic for it to pick up your voice. Which is perfect when you’re recording voice in a noisey environment like your home. By the way the Samson Q2U and the Audio-Technica ATR2100 both come in a kit form as well.
What I found was that every flippin’ noise in house was picked up by the condensor mic. I went through a half-dozen tests before I was able to get the sound levels down to an acceptable level. In one case, it picked up my voice from across the room more loudly than when I was on top of it. Frustrating.
I have an old dynamic mic buried somewhere in the garage. When it gets a little warmer I’ll go hunt it down and give it a try. I’ve also got a lavalier (clip on) mic which I’ll try. Stay tuned.
The good news is that the pattern was correct. Unidirectional is better (less extraneous noise) but cardiod is fine and more flexible.
Microphone Noise
All mics produce an electric hum. It’s just something you live with. If what you are recording is loud enough the hum is just part of the noise floor. You won’t hear it. Which is why your mic needs to record your voice at a fairly high db rate.
Noise floor and db.
Okay, let me explain two things first. Db is a measure of how loud your recording is relative to a base. ACX has specifications for your db values. For example, your RMS must be between -23 and -18 db. Your peak readings can’t be more than -3.0. Your noise floor must be less than-60 db. Remember that these are negatives … so -3.5 db is less than -3.0 and -2.5 is more than -3.0. I know it seems backwards but remember that you’re trying to get as far away from 0 as possible. What is 0 db? It’s the point that the electronics can’t handle the volume and it clips the sound. Clipping is when the sound cuts out.
Noise floor is the sound of silence. Yes, literally. It’s the sound that’s made when the room is completely quiet. It needs to be below -60 db when your recorded sound is between -23 and -18 db. That’s important because your recording probably won’t be between those figures. You’ll have to amplify (also called normalize) the recording to get into the right sound levels. When I recorded I had recording levels of -43 and a noise floor of -78. When I finished processing it, I had -21 and -60 db respectively.
Why is this important now? Because the type of connection gives you more or less flexibility. I have a USB connection so my recording level depends on the power from the computer and the capability of my sound card. I’lll talk more on this under the choice of computer. If I had gone for a pre-amplified connector (XLR or plug), I could have had more control over the initial recording volume (and thus the difference between hum and spoken word). Ah well.
Pop filters and windscreens
One of the things I learned was how important the pop filter (and other filters are). Cutting down extraneous noise is critical. I’ll talk more on this in the lesson learned on choosing a recording space and the recording articles.
Pop filters are a little cloth or metal covered ring (usually) that goes between you and the microphone. They break up the air so that you aren’t blowing directly on the microphone when you pop your ‘P’s. Whenever we say an explosive letter (such as a ‘P’) we push out a burst of air. This air burst booms against the microphone and is registered as a small explosion. We need to prevent that. Technique helps. So does turning the head away from the mic. But a pop filter is the last defense. Besides, they’re cheap and they help indicate where your mouth should be.
Windscreens are the little foam covers that go over the microphone. They are intended to prevent wind from becoming a consistant form of explosive. They can help cut down on movement noise and your popping ‘P’s. Prices vary wildly but again are comparatively cheap.
My Microphone
By the way, before I sign off, let me say that in general, I am very pleased with the Neewer NW-7000 USB microphone. I think it did a great job with recording. It was just the wrong tool for the job (or so I’ve been told). But that gives me some incentive to try building a sound/video booth.
The next article’s lesson learned will deal with picking headphones.